Princess Ky Background - The cutest blog on the block

Showing posts with label Thanksgiving. Show all posts

Friday, November 25, 2011

Giving Thanks - An Autism Experience

In the month of November, we focus on giving thanks. 

I attempted to teach Kylie this important lesson, but very quickly ran into some roadblocks that were placed in our path by Autism.  This post will focus on how we plowed through those roadblocks and learned an important lesson about giving thanks.

Dispersed among this post will also be some recent fall pics - enjoy!! 
(I am an amateur, but I sure enjoy photography)
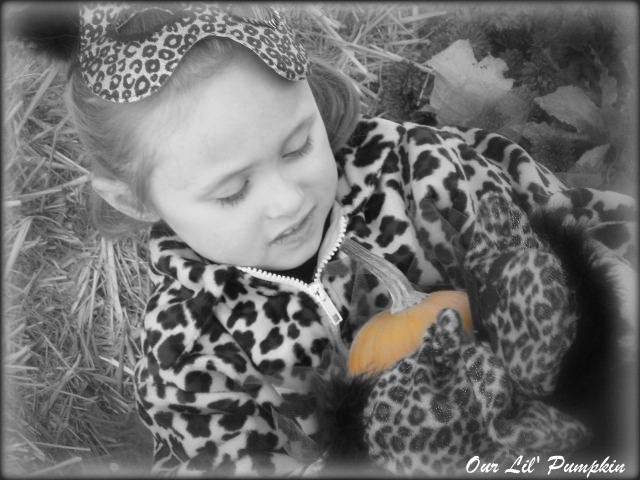
Our Lil' Pumpkin
On November 1st, Kylie awoke to find her new fall themed sensory box.  You can read about it (and see it) here.  I also began the day talking to Kylie about Thanksgiving and what it means to give thanks.

Happy Fall Day
As giving thanks is such an abstract concept, I knew I would have to provide examples so I told Kylie that some kids are thankful for their toys and some kids are thankful for their mom and dad and then I asked Kylie what she was thankful for. 

Without hesitating, Kylie answered "My house". 

I have to tell you that her answer brought tears to my eyes as we have been fighting to keep our house since my husband lost his job last October.  To hear that our simple home is precious to her touched me deeply. 
Kylie and her scarecrow buddy

Admiring all the colorful leaves - God's creation is so breathtaking!!

So, on November 2nd, I asked her again what she was thankful for?  She again answered "My house".  I knew then that Kylie was having a hard time with the concept of "giving thanks" being so abstract.  She thought there was only one correct answer to the question.
A "Kylie Size" pumpkin!
So, I talked to Kylie's Speech Therapist, Julie, and got her advice on how to help Kylie understand better that there can be more than one answer to the question of "What are you thankful for?"

Julie suggested that we make cards of things that Kylie really enjoys and also include cards of things that Kylie does not enjoy and then let her pick each day something she is thankful for.

I told Julie that I knew that would be what she told me but that I was a little disappointed as I really wanted the question to be open ended.   I was so curious as to what Kylie would say. 

Julie explained that open ended questions are really difficult for children with autism, but that maybe after several days of  choosing pictures, the idea of what it all meant would "click" for Kylie and by the end of the month, she might start thinking of things on her own.
Here we are together! 
We don't often have pics together as I am usually the one behind the camera! 

So, we created cards of things she likes:
Candy Corn, Chocolate, Tigger (her cat), Grandparents, Veggie Tales, Disney on Ice, Popsicles, Smelly Markers, Aqua Sand, Climbing, Going to the park, Barbies, Mom and Dad, Pizza Ranch and etc

So happy together!!
And we created cards of things she doesn't like:
Baths, loud noises, babies crying, broccoli, bright lights, elevators, flash on a camera, and etc

I love how in all three pics, Kylie has such a different expression!

Then we created a blank calendar where we could post each days picture selection so Kylie had a visual of what she is thankful for (and doesn't repeat the things she has already said).


Each day we ask Kylie what she is thankful for. She can either choose from the pictures we have created, or she can tell us something else.  It has been really neat to see what she chooses to be thankful for. 

Julie was right.  At first, Kylie stuck to the pictures but as time went on, she began to look around the room and select other things. 

A few of the things she has been thankful for are: House, Thanksgiving, Toys, Mom and Dad, TV, "Me", Ipad, Tigger, Car, Barbies and etc.

It has been really neat to watch her acquire knowledge and understanding of the abstract concept of "Giving Thanks". 

I am so thankful for the team of people who surround us on this journey of experiencing Autism.  God has been so good to place just the right people in our family's circle of influence!

Kylie is thriving because of her loving family, therapists, doctors, counselors, respite providers and our friends.

Wednesday, November 23, 2011

Thanksgiving Story Bracelet/Necklace Tutorial- **NEW** and Improved! ** FREE Printables too!!


I have seen Thanksgiving Story Bracelets all over the web. 

You can peek at a few of them here, here and here. 

So far, all of the ones I have found use colored pony beads. 

I (obviously) LOVE the idea of a bracelet designed to help children remember and retell the Thanksgiving story. 

However, these versions will not work for my Kylie. 

For young children or for those who experience Autism (literal thinkers- see this post for more info), colored pony beads are just too abstract.  There is no identifying information to them.

So, I set out to find a solution to this problem and ended up finding the most wonderful thing!!


Oriental Trading (one of my FAVORITE online stores) sells these fabulous foam beads (a few different fall styles. You can find the different styles here, here, here and here).


They are actually pictures or shapes of things pertaining to fall and Thanksgiving.

So, I have modified the Thanksgiving bracelet idea (which, due to the size of the beads, will now be a necklace) to the following representations (scroll down even further to print my FREE Thanksgiving Necklace Story Cards):


1. Pilgrim Bead:
The Pilgrims left England on September 6, 1620.  A ship called the Mayflower took them across the ocean. They traveled for 3 months in terrible weather.  It was very cold and stormy.

2. Green Cross Bead:
The Pilgrims left England because they wanted to worship God freely.  They prayed to God many times on their journey. The Pilgrims arrived at the new world on December 11, 1620

3. Hat Bead:
The Pilgrims did not have enough warm clothing or a house for the winter.  Many of the people got very sick and many died.

4. Yellow Cross Bead:
The Pilgrims prayed to God asking for help.  They needed someone to rescue them because they were far, far from the safety of England.  They were cold, hungry and needed a warm place to sleep.

5. Two Native American Beads:
In March of 1621 (spring time), God answered the Pilgrim's prayers and sent 2 Native Americans: Samoset and Squanto to the Pilgrim's camp.  Samoset and Squanto could even speak English!!

6. Purple Cross Bead:
The Pilgrims thanked God for taking care of them and for sending a Native American who could speak English.

7.  Three Candy Corn Beads:
Squanto taught the Pilgrims how to plant a garden.  He told them to put a fish and three kernels of corn under the dirt and to plant many rows just like this in their garden. 

8. Red, Green and Yellow Leaf Beads:
In the fall, the garden was ready to be harvested.  They cut down all the vegetables and brought them into the barns.

9. Corn Bead:
There was so much corn and other food that the Pilgrims invited the Native Americans for a GREAT feast to give Thanks to God.

10. Turkey Bead
The Native Americans walked for 2 days in order to come to the big dinner and brought wild turkeys for meat

11. Pumpkin Bead
The Pilgrims brought pumpkins and other fruits and vegetables.

12. Cornucopia Bead
There was a cornucopia of food.  This means that they had plenty to eat.  Everyone ate until they were full.

13. "Give Thanks" Bead
The Pilgrims and the Native Americans gave thanks together.  They were now Friends.

14. Orange Cross Bead
God took care of the Pilgrims and supplied their needs. 

15. Orange Star Bead
Just like the Pilgrims, I am thankful for...(Have child fill in the blank)

16. Green Star Bead
Just like the Native Americans, I am thankful for...(Have child fill in the blank)

17. "Shine with the Light of Jesus" Pumpkin Bead
When I am thankful I "Shine with the Light of Jesus"


And here is the finished product!!


I also made Story Cards that share what each bead stands for and laminated them.  I also attached sample beads to The Story Cards (you could print pictures too).  That way, Kylie can look to the paper for prompts.  It will also assist anyone that she is trying to communicate the story to (Kids who experience Autism often have speech difficulties as well).


 Click on the following pictures to print the Story Cards (be sure to select full page for paper size)...
Little Ones will LOVE telling you the story of their Thanksgiving Necklace!!


Enjoy!! and Happy Thanksgiving!!

Saturday, November 12, 2011

A Teacher FAILS Thanksgiving!! (Important lessons learned)


My daughter Kylie has been diagnosed as being on the Autism Spectrum.  When we explain our situation to others, we choose to say that our family "experiences Autism".  

Autism may encompass many varied learning barriers.  But, if you know what to look for, know how to adapt and flex your teaching style, you can be very successful in encouraging a child who loves learning.

I had an opportunity to put that theory to practice just this week. 

In my search for November activities that would support my teaching of the First Thanksgiving, I found lovely (and FREE) printables from both here and here (when this second one opens, scroll down to the bottom to find the free printables). 

Let me just say that these gals do such a great job!

I was particularly drawn to a handout at both websites that focused on categorizing things.  Kylie's Speech Therapist, Julie, has been working on this with Kylie and I thought it would be a great way to continue that learning at home.

I printed both handouts, cut them out, laminated them and had everything all ready. 

One of the printables had photos of the Fisher Price Thanksgiving set and I knew Kylie would be really attentive to that as this toy is part of our November Sensory bin.

The purpose of the printable activity was to show Kylie different pictures and have her categorize them by "People" or "Food"

I combined both sets of pictures so she had more to categorize.

I first showed her one of the pictures of food and asked her which side it went on: "People" or "Food"?  Kylie studied the picture and then placed it on "Food"

I offered her a few more food category selections and she categorized them correctly as well.


Feeling confident that she knew the idea behind the game, I then showed her a "People" card and again asked her "Food or People?" 

Kylie looked at the picture, studied the picture and was really trying to decide what to do. 

I could just see the wheels turning in her brain and I was puzzled by her lack of answer.  It was actually painful for me to see her hesitation.

I looked at the picture and (to me) clearly it was a "people" - why was Kylie having such trouble?


...And then it hit me like a ton of bricks! 

Take a closer look at the pictures.  What is each "Person" holding?


They are each holding a FOOD item!!

No wonder Kylie was having such a hard time trying to decide where it went.  It fit BOTH categories.

You see, children who experience Autism or who are on the Autism Spectrum tend to be very literal thinkers.  These children see things that you or I would pass over.  They have very acute vision, hearing and thinking processes. 

These individuals are .... BRILLIANT!!

 I felt badly when I realized that I had set Kylie up with (in her mind) a "trick question."

Rest assured my daughter earned herself an A+ on the activity. 

Did this Mommy pass or fail? 

Well, I failed at the activity but I passed in learning a valuable lesson!

How do I fix this issue?

I need to find pictures of people who aren't holding food!  That should be pretty easy to do!

Note to self:   Remember that Kylie is a very literal thinker. 

Children and Adults who experience Autism have a very difficult time with metaphors and idioms. 

For example:

If you were to say (metaphor) "It's raining Cats and Dogs" they would look for cats and dogs to fall out of the sky.

If you were to say (idiom) "He has a chip on his shoulder" they would look for a Dorito on a man's shoulder

Please take a minute to read this short article by an individual who experiences Autism and what they say are phrases that confuse them.  The comments left by her readers are insightful as well.

Another personal example of this...

When I bathe Kylie and wash her hair, I often tell her to "look to the sky" so I won't get soap or water in her eyes.  She isn't always cooperative, but we manage.

The other day, as I was soaking in the tub, Kylie came into the bathroom and started to "help" me.  She took me by the head and said "look to the sky" but instead of pointing my eyes to the ceiling, she turned my head to the window! 

ding, ding, ding, - another bell went off in my mind!  I need to ask her to look at the ceiling vs look to the sky!  After 5 years, you would think I would know these things!!

I guess it just proves that we all have things to learn and we all need to grow as individuals.  Bless my daughter for loving me even with my shortcomings! 

Hope you all are doing better than I am!!

P.S.  This would be a great article to share with caregivers, teachers, and etc.

Friday, November 11, 2011

A Sensory Cornucopia


For the month of November, I am trying to teach Kylie the history of the first Thanksgiving (on her level, of course) and what it means to be thankful. 

I really wanted to show her what a Cornucopia (or Horn of Plenty) was but had an awful time finding one. 

This led me to try and put one together myself. 

The finished product ended up being a GREAT addition to our November sensory items.

I found a set of sticky, yet squishy, play food at Oriental Trading.  These fruits are filled with some kind of styrofoam and they are very pliable (like a stress ball but even squishier - is that a word? ha!).  They came 12 to a package.  Click here to purchase (they are currently 40% off and selling for $5.99 - normally $10.00- A GREAT DEAL!!) - Act quickly!!


They tend to get fuzzy if you play with them on carpet or if you line them up on the floor like my Kylie does. HOWEVER...they are very easy to clean.  I jut run them under cold water and brush the fuzz off.  I then lay them on a dishtowel to dry.  They are like new again.

It took me a long time to find an actual Cornucopia to put them in so we started off just having them in a bowl.  (I picked up the bowl in the Target dollar aisle a long time ago)


I finally found a woven/basket type Cornucopia at Michael's Craft Store.  If you hurry, they are in a sale bin for 70% off. 


Kylie is getting a great workout squeezing the fruit.


She doesn't always like the feel but, so far, she has tolerated it and it is helping to desensitize her avoidance of such textures.


We had to have a little talk explaining the difference between a "horn" and a "horn of plenty"  - No, we DON'T put the Cornucopia in our mouth!  ick!


After all the frustration of trying to find a cornucopia and coming up with nothing.  I am pleasantly surprised by what we ended up putting together. 

This cornucopia will be great to experience for years to come.


Here's a link if you would like to read the history and uses of a Cornucopia in our culture.

"Let us remember that, as much has been given us, much will be expected from us, and that true homage comes from the heart as well as from the lips, and shows itself in deeds."

  ~Theodore Roosevelt

Thursday, November 10, 2011

Button Turkey Tutorial


If you have followed my blog for any length of time, you know that I am the queen of altering and adapting things.  I can't leave well enough alone and always have to put the "Amy spin" on things.

I am often inspired by things I have seen online or in my daily life, but they often don't quite work for my family or I get creatively inspired to enhance what I have seen to suit my taste/needs.


My Button Turkey is another one of those projects.

I first saw a Button Turkey here, here and here.

As you can tell (if you click on those links), there are only about 5 feathers for the child to work with.  This would be great for beginners, but I felt my daughter needed more of a challenge. 

So, I began to brainstorm how I could alter the design to better suit my daughter's needs.  Most of you already know that Kylie has poor strength in her hands, wrists and upper body in general, so I am constantly in search of activities that will work her fingers and help to increase that strength and coordination while also being fun, tactile and visually appealing.

Once I came up with my idea, I began to search for a pattern for the Button Turkey but never was able to find one, so I decided to create my own.

Yes, I am going to share it with you.  You can print it by clicking on the below image:

After clicking the image, click on the printer icon at the top right of your screen.  Select the size you wish to print (I suggest a full page).  You may also want to laminate the pieces for durability.  I found this to be very helpful.


You will want to cut out (in the felt colors/patterns of your choosing):
** 11 small feathers
** 11 large feathers
** 2 Circles for the body
** 1 cut out of all the other pieces (eyes, nose, waddle and head/neck).

Another reason I loved this idea/craft is that it is soooo inexpensive to make.  You probably have half the things you need right at home.

Supplies you will need:
**You will need Felt.  You can see the pics in this post to see the colors I chose. 

The one thing that I think is REALLY neat is the stamped/pressed felt that I used for the body.  It is called "cobblestone" and I found it at Michael's Craft Store.  I thought it really added some good texture and dimension to the project.


Isn't this cobblestone felt cool? It really makes the "body"

I also found some sparkly and patterned sheets of felt at Hobby Lobby.  All these little touches help keep it fresh and exciting when your child is buttoning 22 feathers.  

**You will also need a good pair of scissors that cut felt easily

**I used a disappearing ink felt tip pen to do my tracing (I found it at Walmart in the sewing section)

**You will need a needle and various color threads to match your felt turkey body colors.  I used mainly brown, red, orange and cream from a travel sewing kit I had stashed in a closet.

**You will need 24 buttons (I found mine at Michael's).  22 for the feathers (you can do 11 front and 11 back) plus 2 smaller buttons for the Turkey's eyes.

**You will need stuffing (optional) (Kylie had a stuffed animal with a hole in it, so I "borrowed" some stuffing from our formerly stuffed friend.)


Directions:

1. Print, laminate and cut out your pattern
2. Trace 11 large feathers and cut them out before the ink disappears
3. Trace 11 small feathers and cut them out before the ink disappears
4. Trace  2 circles and cut them out before the ink disappears
5. Trace 2 eyes, 1 waddle, 1 nose/beak and 1 head/neck and cut out before the ink disappears.  You may want to keep these pieces in a plastic baggy to keep them from getting lost.
6. Label the circle that will be the front of the turkey 
7. Position the small feathers around the front circle of your turkey.
8. Sew on the buttons to the front circle so the buttons correspond to your feathers.
9. Cut slits in the feathers to be used as button holes.
10. Repeat steps 6-9 for the back circle and the large feathers.
11. Set all of those pieces aside for now.
12. Sew the 2 buttons onto the eyes (I used blue small buttons on cream circles)
13. Attach the eyes (felt and buttons) to the head/neck (you can either sew by hand or use fabric glue
14. Sew or Glue the Waddle on to the Head/Neck
15. Sew or Glue the Nose/Beak to the Head/Neck
16. Sew or Glue the Head/Neck to the front circle.
17. Optional Step: place a little stuffing in the Head/Neck toward the end of your sewing to give it some "plump"
18. Glue or Sew (I prefer sewing by hand) the front circle of the body to the back circle of the body making sure all of the buttons are on the outside of the circles.
19. Optional Step: place a little stuffing between the circles before your sewing is complete to give it a little "plump"
20. Attach the small feathers to the front of the turkey
21. Attach the large feathers to the back of the turkey
22. Take A picture and send it to us.  =0)

Here are a few pics of the steps.

The feathers all cut out
Frontal view of the naked turkey
Rear view of the naked turkey. 
Notice I used two different colors/patterns of brown for the front and back of the body
Rear view with feathers attached.
Kylie just starting to put together her Turkey
This was a little workout for Kylie's fingers. 
The buttons I chose for the front added a level of difficulty
Kylie was a little trooper and really stuck with it. 
By the end, her little fingers were shaking, but she was a determined little girl.

Kylie LOVES her turkey!
Here is a little video clip of Kylie interacting with her Turkey.... Enjoy!!


And a final pic of the finished product.


I will praise the name of God with a song, And magnify Him with thanksgiving.
Psalm 69:30

Wednesday, November 9, 2011

FREE Thanksgiving Book and Printable Activities

Here are a few more activities that we have been doing lately.  I love that they are very tactile, colorful and very visually appealing to the eye.  Kylie is a more visual learner so these work perfectly for her.

Life Cycle of a Pumpkin
I have Kylie label each picture and then put them in order

 I found these GREAT activities and was inspired by MANY MORE here  (note: if you download this activity pack, it does take a few minutes as it is over 60 pages of activities)

For this one, she is to add the colored wiggle eyes (which I found at Michael's Craft Store) to each colored creature

 
I was able to customize this activity specifically for Kylie and I LOVE that personal touch!  It also worked out perfectly that the activity is based on/adapted from one of her favorite books: "Brown Bear, Brown Bear" by Bill Martin Jr/Eric Carle


See  how I was able to add Kylie's picture as the "trick-or-treater"? She loved seeing herself in the book!


I was so inspired by this personalized and adapted book that I decided to create a Thanksgiving Version as well! 

You can print the Thanksgiving Book by clicking the following images: 

After clicking on the images below, click on the printer icon at the top right of your screen, Choose what size you want to print the images (I suggest full page)


Once each sheet has printed, cut them apart and either bind them together with a binder ring or simply put them into a small photo album. 

This is also a great teaching tool for teaching your child about the First Thanksgiving.

I love the book "What is Thanksgiving?" and we love the Charlie Brown Thanksgiving dvd - they complement this activity beautifully!

We also have "Squanto and the Miracle of Thanksgiving". It is a GREAT resource for older children but will be too detailed for preschoolers.

I hope you are having a GREAT month reminiscing about all the things, people and memories you can be thankful for.

Be sure to stop back later in the week, I made the cutest turkey for Kylie to exercise her small motor muscles.... it will be coming soon!